My universal methods for achieving a better gaming experience on Windows handheld with the lowest energy consumption

AMD Algorithm Priority (Not Recommended)

  1. Install AMD Software Adrenalin Edition
  2. Enable HYPR-RX (a series of optimizations)
  3. Lower the game resolution from 1920×1080 to 1280×720, 1366×768, or 1600×900
  4. Ensure Radeon Super Resolution is enabled (upscaling/resolution)
  5. Ensure AMD Fluid Motion Frames is enabled (frame interpolation)
  6. Lower the TDP to achieve 60fps through frame interpolation; further reduce for non-action games

The above steps aim to run games at low frame rates, low resolution, and low TDP, and then use AMD technologies applicable to all games for frame interpolation and upscaling/resolution to achieve a minimum TDP operation of 1080p 60fps. The image quality will be worse than native 1080p 60fps, but it can improve battery life by about 20-40%.

Power Saving Priority

  1. Install AMD Software Adrenalin Edition
  2. Turn off CPU Turbo Boost
  3. Remove frame rate limits in games and other management software
  4. Enable custom mode
  5. Enable Radeon Chill
  6. Set the minimum FPS to 30 and the maximum FPS to 45-60
  7. Enable Radeon Image Sharpening (optional, adds filter to sharpen object edges)

The above steps use Radeon Chill to dynamically lock the frame rate, adjusting to the maximum FPS during intense action and to the minimum FPS when there is no action to save power. Radeon Super Resolution and Fluid Motion Frames cannot be enabled simultaneously with Radeon Chill. Additionally, the low-power Radeon Image Sharpening filter can be used to sharpen object edges and make the image look clearer.

Lossless Scaling Algorithm with Power Saving (Recommended)

  1. Install AMD Software Adrenalin Edition.
  2. Disable CPU Turbo Boost.
  3. Remove frame rate limits in the game and other management software.
  4. Enable custom mode.
  5. Enable Radeon Chill.
  6. Set minimum FPS to 30 and maximum FPS to 45-60.
  7. Install Lossless Scaling.
  8. Set the game to 1280×720 windowed mode.
  9. Enable Scaling Type.
  10. Enable Frame Generation.

The above steps use the Lossless Scaling software to replace Radeon Super Resolution and Fluid Motion Frames. It enables Radeon Chill and simultaneously uses the superior Lossless Scaling algorithm for frame interpolation and upscaling /resolution. This achieves a better gaming experience and battery life compared to the AMD Algorithm, making it the recommended choice for users.

如何讓Windows掌機在最低能耗下實現更好遊戲體驗的通用方法

AMD算法優先(不推薦)

  1. 安裝AMD Software Adrenalin Edition
  2. 開啟HYPR-RX(一系列優化)
  3. 將遊戲解析度從1920×1080調降至1280×720、1366×768或1600×900
  4. 確認Radeon Super Resolution已啟用(升頻/解析度)
  5. 確認AMD Fluid Motion Frames已啟用(補幀數)
  6. 將TDP調降至透過補幀可達60fps,非動作遊戲可進一步調降

上述是在遊戲不支持原生FidelityFX Super Resolution(FSR)的情況下,以低幀數、低解析度和低TDP運行,再透過適用所有遊戲的AMD技術來補幀和升頻(解析度),以達成最低TDP運行1080p 60fps之方法,畫質會比原生1080p 60fps差,但可提升20-40%左右的續航力。

省電優先

  • 安裝AMD Software Adrenalin Edition
  • 關閉CPU睿頻
  • 在遊戲和其他管理軟體解除幀數限制
  • 開啟自訂模式
  • 啟用Radeon Chill
  • 設置最小FPS 30,最大FPS 45-60
  • 開啟Radeon Image Shapening(加濾鏡銳化物體邊緣,可選)

上述是利用Radeon Chill動態鎖幀,在激烈動作時調整至最大FPS,在沒有動作時調整至最小FPS,用最少的電力換取更好的體驗(Radeon Super Resolution及Fluid Motion Frames不可與Radeon Chill同時啟用)。還可加上低功耗的Radeon Image Shapening濾鏡銳化物體邊緣,讓畫面看起來更清晰。

Lossless Scaling算法與省電(推薦)

  • 安裝AMD Software Adrenalin Edition
  • 關閉CPU睿頻
  • 在遊戲和其他管理軟體解除幀數限制
  • 開啟自訂模式
  • 啟用Radeon Chill
  • 設置最小FPS 30,最大FPS 45-60
  • 安裝Lossless Scaling
  • 將遊戲設置為1280×720視窗模式
  • 啟用Scaling Type
  • 啟用Frame Generation

上述是以Lossless Scaling軟體取代Radeon Super Resolution及Fluid Motion Frames,啟用Radeon Chill同時使用更好的Lossless Scaling算法補幀和升頻(解析度),可達成比AMD算法更好的遊戲體驗與續航力,推薦網友優先採用。

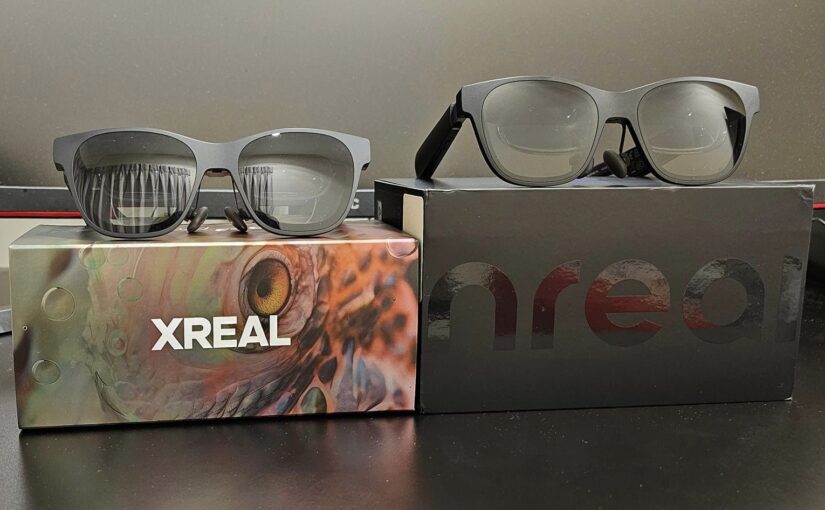
My Experience with XREAL Air 2 Pro AR Glasses

As an enthusiast of VR, AR, and MR, I sincerely believe that Apple Vision Pro’s biggest competitor in the future is XREAL (formerly NREAL). XREAL introduced the XREAL Air product, achieving an ultimate slim design for AR glasses and using a smartphone as the computational solution by a Chinese company.

The XREAL Air display component has a limited field of view (FOV) of only 46 degrees, which falls short of the immersive requirements for VR experiences. The developer ecosystem is not robust enough, and there is no dedicated app store, resulting in a lack of sufficient content for the primary AR experience. However, due to its relatively affordable price, lightweight design, higher pixel density (PPI), and a real background light (non-VR-generated realistic background), XREAL Air serves as a 3 DoF giant screen display with superior clarity and comfort compared to various VR devices. It is especially suitable for watching videos and playing games while lying down.

XREAL Air, as an excellent giant screen, is often used in conjunction with the Steam Deck for gaming or with high-end Samsung phones supporting the Dex operating system for watching videos. You may also consider purchasing the hastily released Beam, the official computing terminal device from XREAL, to upgrade the giant screen from 0 DoF to 3 DoF. However, its performance, image quality, operating experience, and application support are not as good as the former two options.

In addition, the second-generation product, XREAL Air Pro 2, improves comfort, speaker sound quality, and achieves individual color calibration. The upcoming XREAL Air 2 Ultra adds two cameras to support 6 DoF and hand tracking, emphasizing Spatial Computing, taking a step further toward XR, resembling a more affordable and lightweight version of Apple Vision Pro. However, facing Apple Vision Pro’s luxurious hardware, XREAL Air 2 Ultra is noticeably lacking in numerous sensors, raising concerns about its overall effectiveness.

Nevertheless, the simplified hardware architecture of XREAL Air 2 Ultra has increased my expectations for the ultimate slim and comfortable XR glasses. As a user of XREAL Air and Air 2 Pro, I will now compare the hardware advancements in the context of video watching and gaming scenarios.

The improvements of XREAL Air 2 Pro are as follows:

  • 10% lighter (72 grams for the second generation, compared to 79 grams for the first generation).
  • 20% higher brightness (500 nits for the second generation, compared to 400 nits for the first generation).
  • Color calibration on an individual basis, resulting in smaller color deviations.
  • More balanced weight distribution in the frame, preventing a top-heavy feel.
  • The nearsighted glasses frame is positioned at a more appropriate distance from the eyeballs, avoiding contact between eyelids and lenses.
  • Softer nose pad cushions, reducing the likelihood of imprints and discomfort on the nose.
  • The Pro version includes electrochromic lenses, allowing for three-stage adjustment of outdoor lighting, providing practical functionality.

The drawbacks are as follows (not officially disclosed by the manufacturer):

  • Smaller display components and a reduced pupil distance (PD), resulting in blurred edges of the display, with more pronounced effects for individuals with larger pupil distances. This issue was not present in the first generation.
  • Unexplained reasons leading to high-contrast scenes, such as white text on a black background, causing more severe glare compared to the first generation.

XREAL Air 2 Pro AR眼鏡的使用心得

身為VR、AR及MR的愛好者,我真心認為Apple Vision Pro,未來最大的競爭者是XREAL(前NREAL);一間推出XREAL Air產品,把AR眼鏡極致輕薄化,用手機作為運算解決方案的中國公司。

由於XREAL Air顯示元件只有46度的可視範圍(FOV),達不到VR沉浸體驗的要求,開發者生態不夠蓬勃,也還沒有自己的應用商店,以至於主打的AR體驗沒有足夠的內容。但受益於相對親民的價格、輕薄的體積、較高的像素密度(PPI),以及真實的背景光(非VR再生成的現實背景),作為3 DoF巨屏顯示器,畫面清晰度及舒適度都遠勝過各種VR設備,特別適合躺著看影片和玩遊戲。

XREAL Air作為一塊優秀的巨屏(巨大顯示器),用戶經常搭配Steam Deck來玩遊戲,或使用支持Dex操作系統的三星高階手機來看影片;你也可以考慮購入官方倉促推出的計算終端裝置Beam,將巨屏從0 DoF提升至3 DoF,但其效能、畫質、操作體驗與應用支持,都不如前面兩者。

此外,XREAL二代產品Air Pro 2,提升了配戴的舒適度、揚聲器音質,並做到逐台調色,即將發布的XREAL Air 2 Ultra還增加了兩個攝像頭,以支持6 DoF和手部追蹤,主打空間運算Spatial Computing,讓這個產品進一步邁向XR,頗有Apple Vision Pro輕薄廉價版本的架式。但面對Apple Vision Pro豪華的硬體,XREAL Air 2 Ultra明顯缺乏眾多感測器,其效果令人堪憂。

無論如何,XREAL Air 2 Ultra簡潔的硬體架構,讓我對極致輕薄、舒適配戴的XR眼鏡有了更多期待。最後作為XREAL Air及Air 2 Pro的用戶,我將以看影片與玩遊戲的使用場景,為您比較二代硬體的進步:

Xreal Air 2 Pro進步如下:

  • 重量輕10%(二代72克,一代79克)
  • 亮度高20%(二代500尼特,一代400尼特)
  • 經過逐台調色,色差更小
  • 鏡腳有更平衡的配重,不會頭重腳輕
  • 近視鏡架與眼球有更適當的距離,避免眼皮碰到鏡片
  • 更軟的氣墊鼻托,讓鼻子不容易產生壓痕與不適
  • Pro版本還有電致變色鏡片,可以三段調整戶外光線,此功能非常實用

缺點如下(官方未揭示):

  • 較小的顯示器元件及更小的瞳距(PD),導致畫面邊緣模糊,瞳距大者會更嚴重,一代無此問題
  • 不明原因,導致高反差畫面,如黑底白字,會有更嚴重的散光,一代無此問題

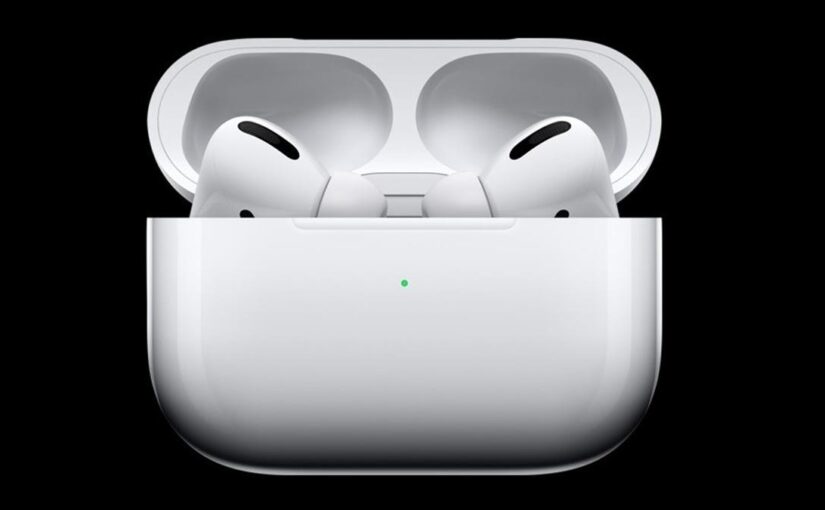
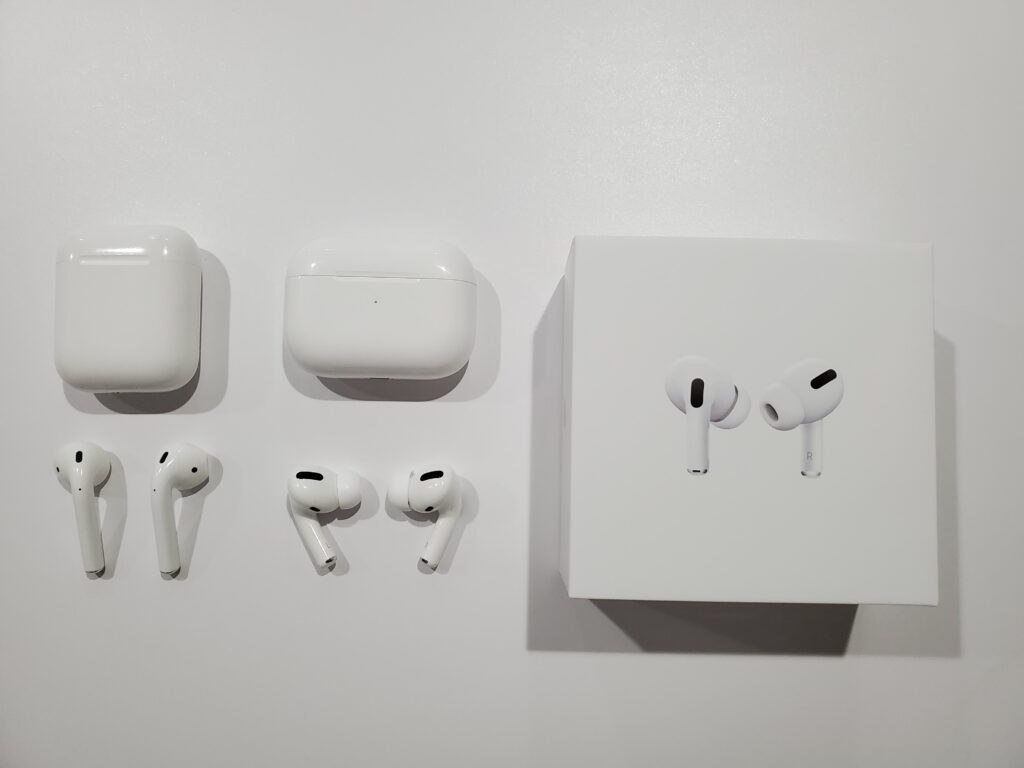
Airpods 2與Airpods Pro評測與對比

去年在香港機場買了Airpods 2後,由於它戴起來非常舒適,如今已經變成我最常用的耳機,雖然他的音質不如其他高端耳機,但也相當夠用了。萬萬沒想到的是,幾個月後擁有降噪功能的Airpods Pro發表了。

雖然我平常也有隔音降噪的需求,但考慮到荷包的重量,我一直忍受捷運及街頭的噪音,直到今天看到PChome週年慶,才以便宜新台幣1800元,也就是6190元的特價購入。使用幾個小時之後,在此提供Airpods 2與Airpods Pro的比較與心得,給想要購買的朋友參考。

AirPods 2與AirPods Pro

AirPods 2

優點:

  • 目前用戴過最舒適的耳塞式耳機,有時甚至會忘了它的存在
  • 擁有中上的音質,符合一般大眾的口味
  • 無線耳機與麥克風功能,除了iOS裝置,也適用於Android及其它藍芽裝置
  • 可提供超過24小時的聆聽時間,或長達18小時的通話時間
  • 充飽一次電後,最長可提供5小時的聆聽時間或3小時的通話時間
  • 網路售價約新台幣4090元,比AirPods Pro便宜2100元

缺點:

  • 偶爾會受到干擾,導致一耳或全部連線中斷,但大多數的情況會很快恢復
  • 採用Lightning接頭充電,Android使用者必須多帶一條充電線
  • 只能在iOS裝置上,呼叫Siri語音助理;也就是無法在Android上呼叫Google Assistant
  • 開放式耳塞,無隔音效果,在吵雜的環境必須調高音量,可能會影響耳朵的健康

獅子評分

評分:5 分,滿分為 5。

AirPods Pro

優點:

  • 目前用戴過最舒適的耳道式耳機
  • 跟Airpods 2差不多的中上音質,符合一般大眾的口味
  • 無線耳機與麥克風功能,除了iOS裝置,也適用於Android及其他藍芽裝置
  • 物理隔音加降噪功能,確實可以消除80%的低頻噪音,適合在捷運上使用
  • 通透模式下,還原的外界聲音,近似真實的情況

缺點:

  • 由於塞住耳道,舒適度還是略差於Airpods 2,甚至是一般耳塞式耳機,久戴會有疼痛感
  • 偶爾會受到干擾,導致一耳或全部連線中斷,但大多數的情況會很快恢復
  • 採用Lightning接頭充電,Android使用者必須多帶一條充電線
  • 只能在iOS裝置上,呼叫Siri語音助理;也就是無法在Android上呼叫Google Assistant
  • 開啟降噪模式,在馬路上使用必須特別注意安全
  • 由於降噪功能,聆聽與通話時間比起Airpods 2略少10%
  • 雖是耳道式耳機,但設計上只有貼緊耳道而未深入,隔音效果不如一般耳道式耳機
  • 網路售價約新台幣6190元,比AirPods 2貴2100元

獅子評分

評分:4.5 分,滿分為 5。

網友們可能會詢問,那麼Airpods 2和AirPods Pro哪個好?若撇除預算限制,我認為好壞取決於你的使用環境。Airpods 2有最舒服的設計,但容易受噪音影響,最適合在室內的使用;Airpods Pro則是為了隔音,犧牲了一點舒適性,並擁有良好的降噪功能,特別適合在通勤及戶外使用。如果你預算充足,買兩款交替使用也不嫌多餘。